Inbox
Inbox gives you the ability to create tickets and assign them to your team, provide templated responses, and track the progress of responses from within the Customer Feedback Centre. This allows your team to stay on top of your reputation and support. Think of it as your central hub for customer service. Let’s dive in and see how Inbox works.
There are two parts to this Userguide: 1 SETUP (see below) 2 MANAGEMENT (see below)
Log in to your Customer Feedback Centre account. Select the desired location for this automation.
SETUP
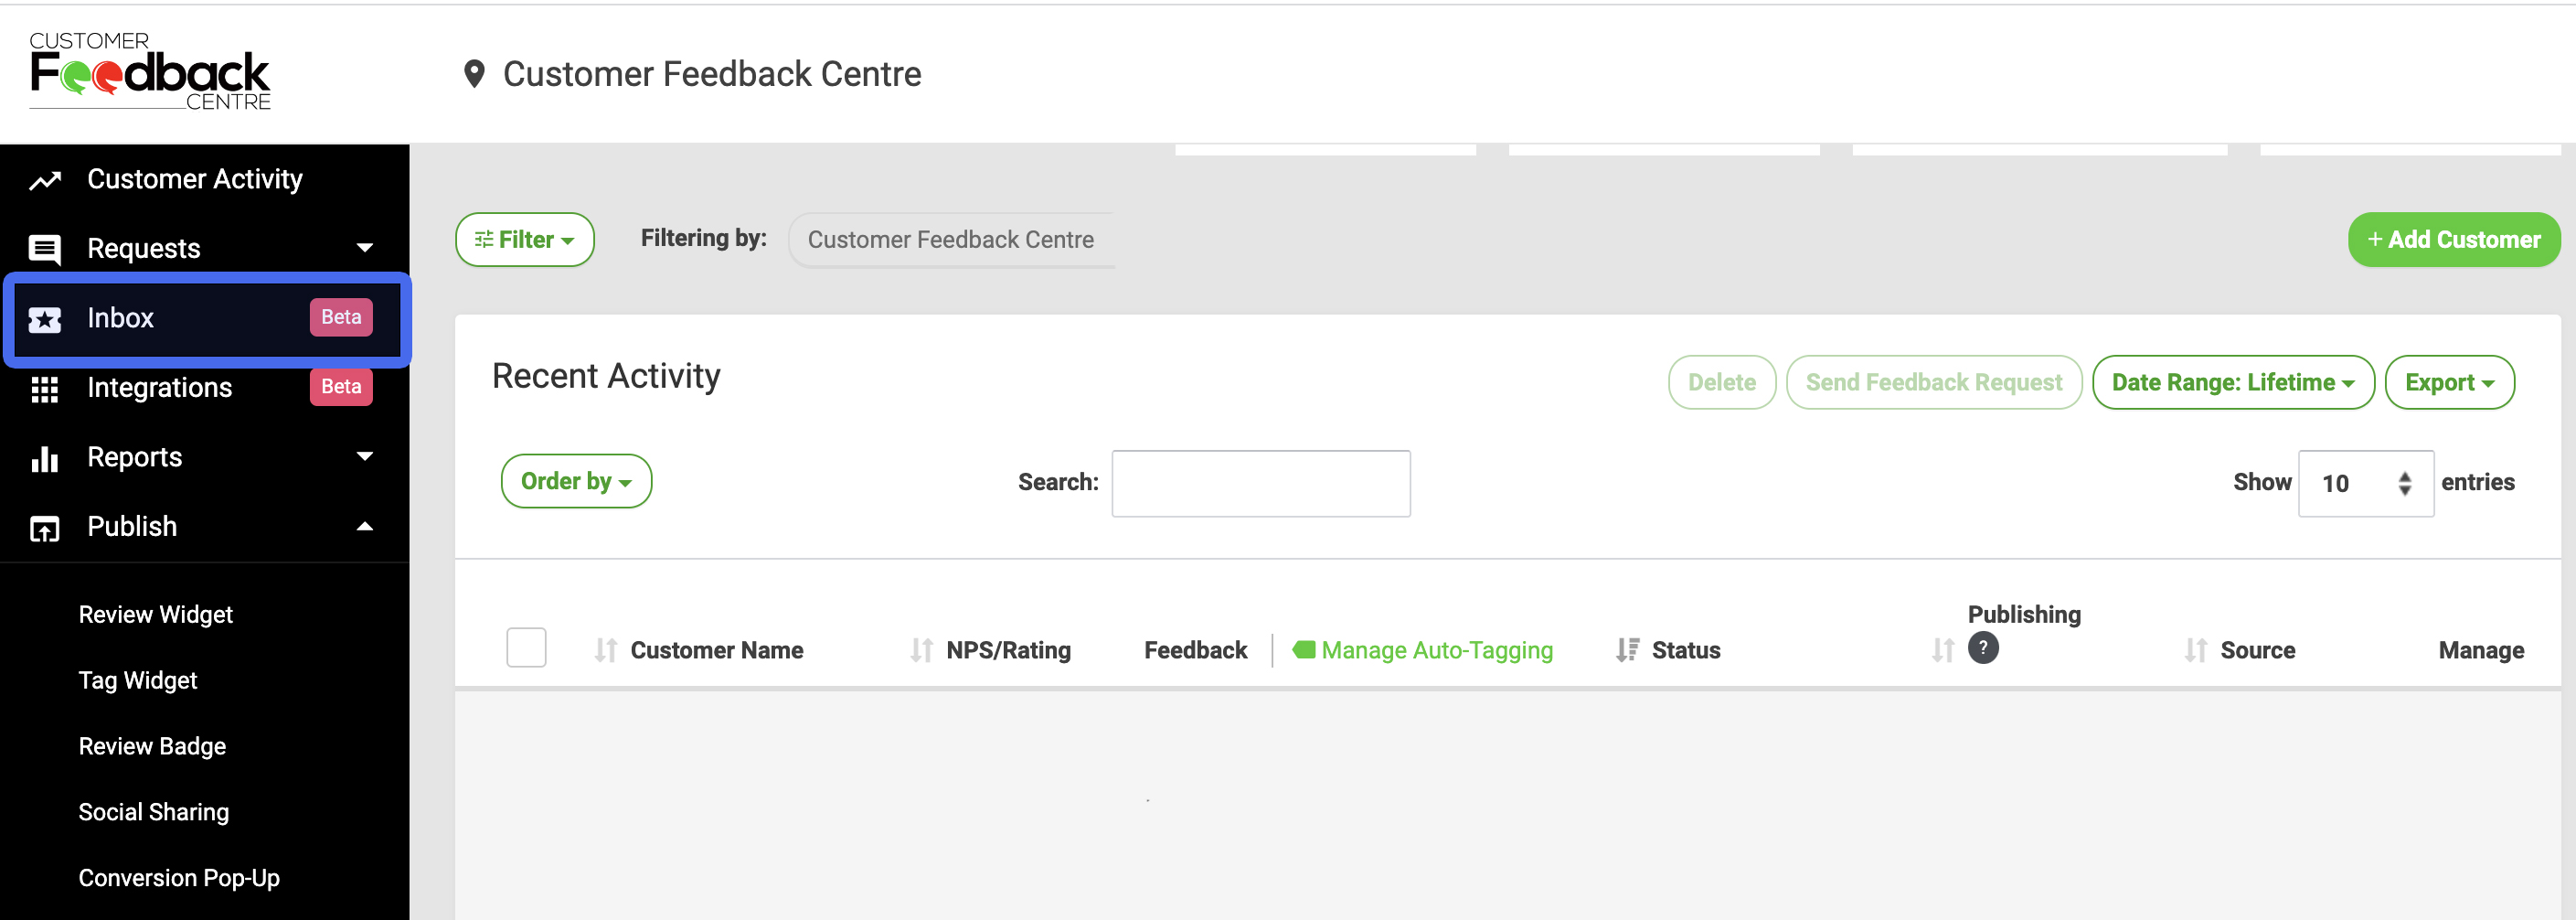
- Before you assign a ticket, you’ll want to set up your settings to make things easier. Click “Inbox” in the left-hand menu. This option is visible on the Business Dashboard or Customer Activity Screen.
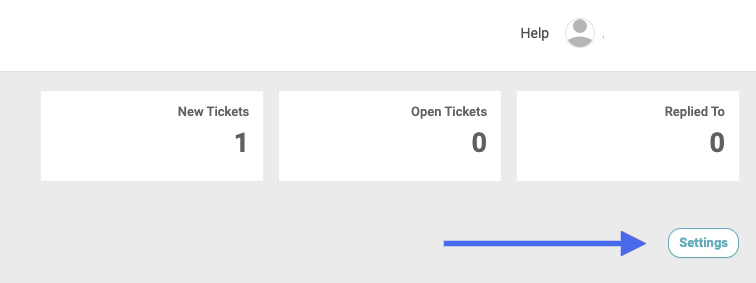
- Click “Settings” on the right side of the screen.
-
From the Settings screen, you can create Reply Templates, set Routing Rules, and set Notifications.
-
Create a Reply Template - Reply Templates give you easy-to-implement templates that make replying to customers more efficient.
A. Click “+Create Template”

B. In the box that appears, give your template a Name and provide written content for the template. When the template is to your liking, click “Save”
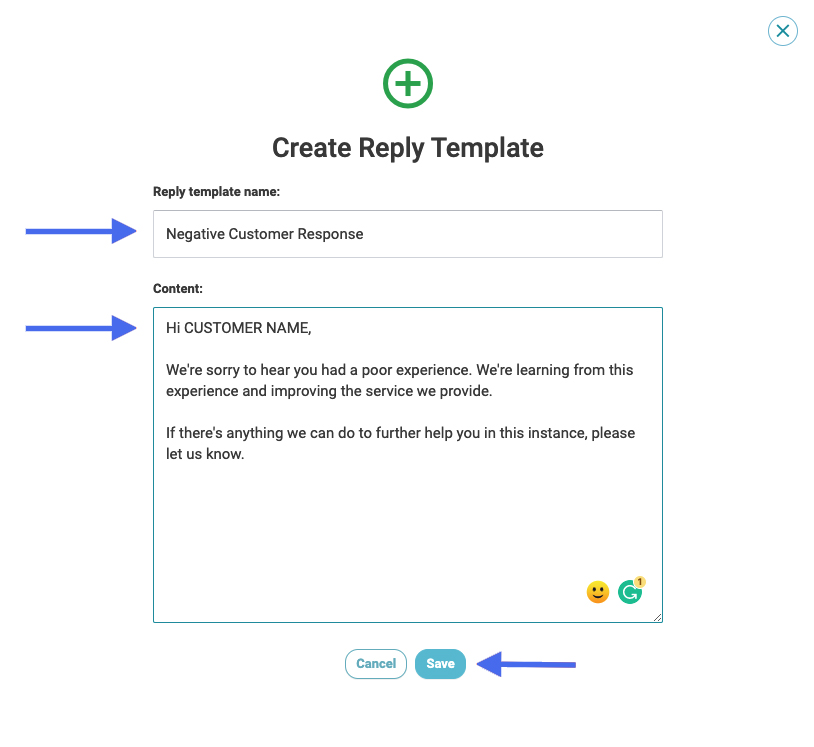
C. You can view your Template(s) on the Settings screen. To Edit or Delete the Template, simply click “Manage”

- Create Routing Rules - Routing Rules let you dictate which User Account should receive tickets automatically.
A. Click “+Create Rule”

B. In the box that appears, give your Routing Rule a Name, select which User will receive the tickets, select the locations or labels the rule will be applied to, and set conditions. When the Rule is to your liking, click “Create”
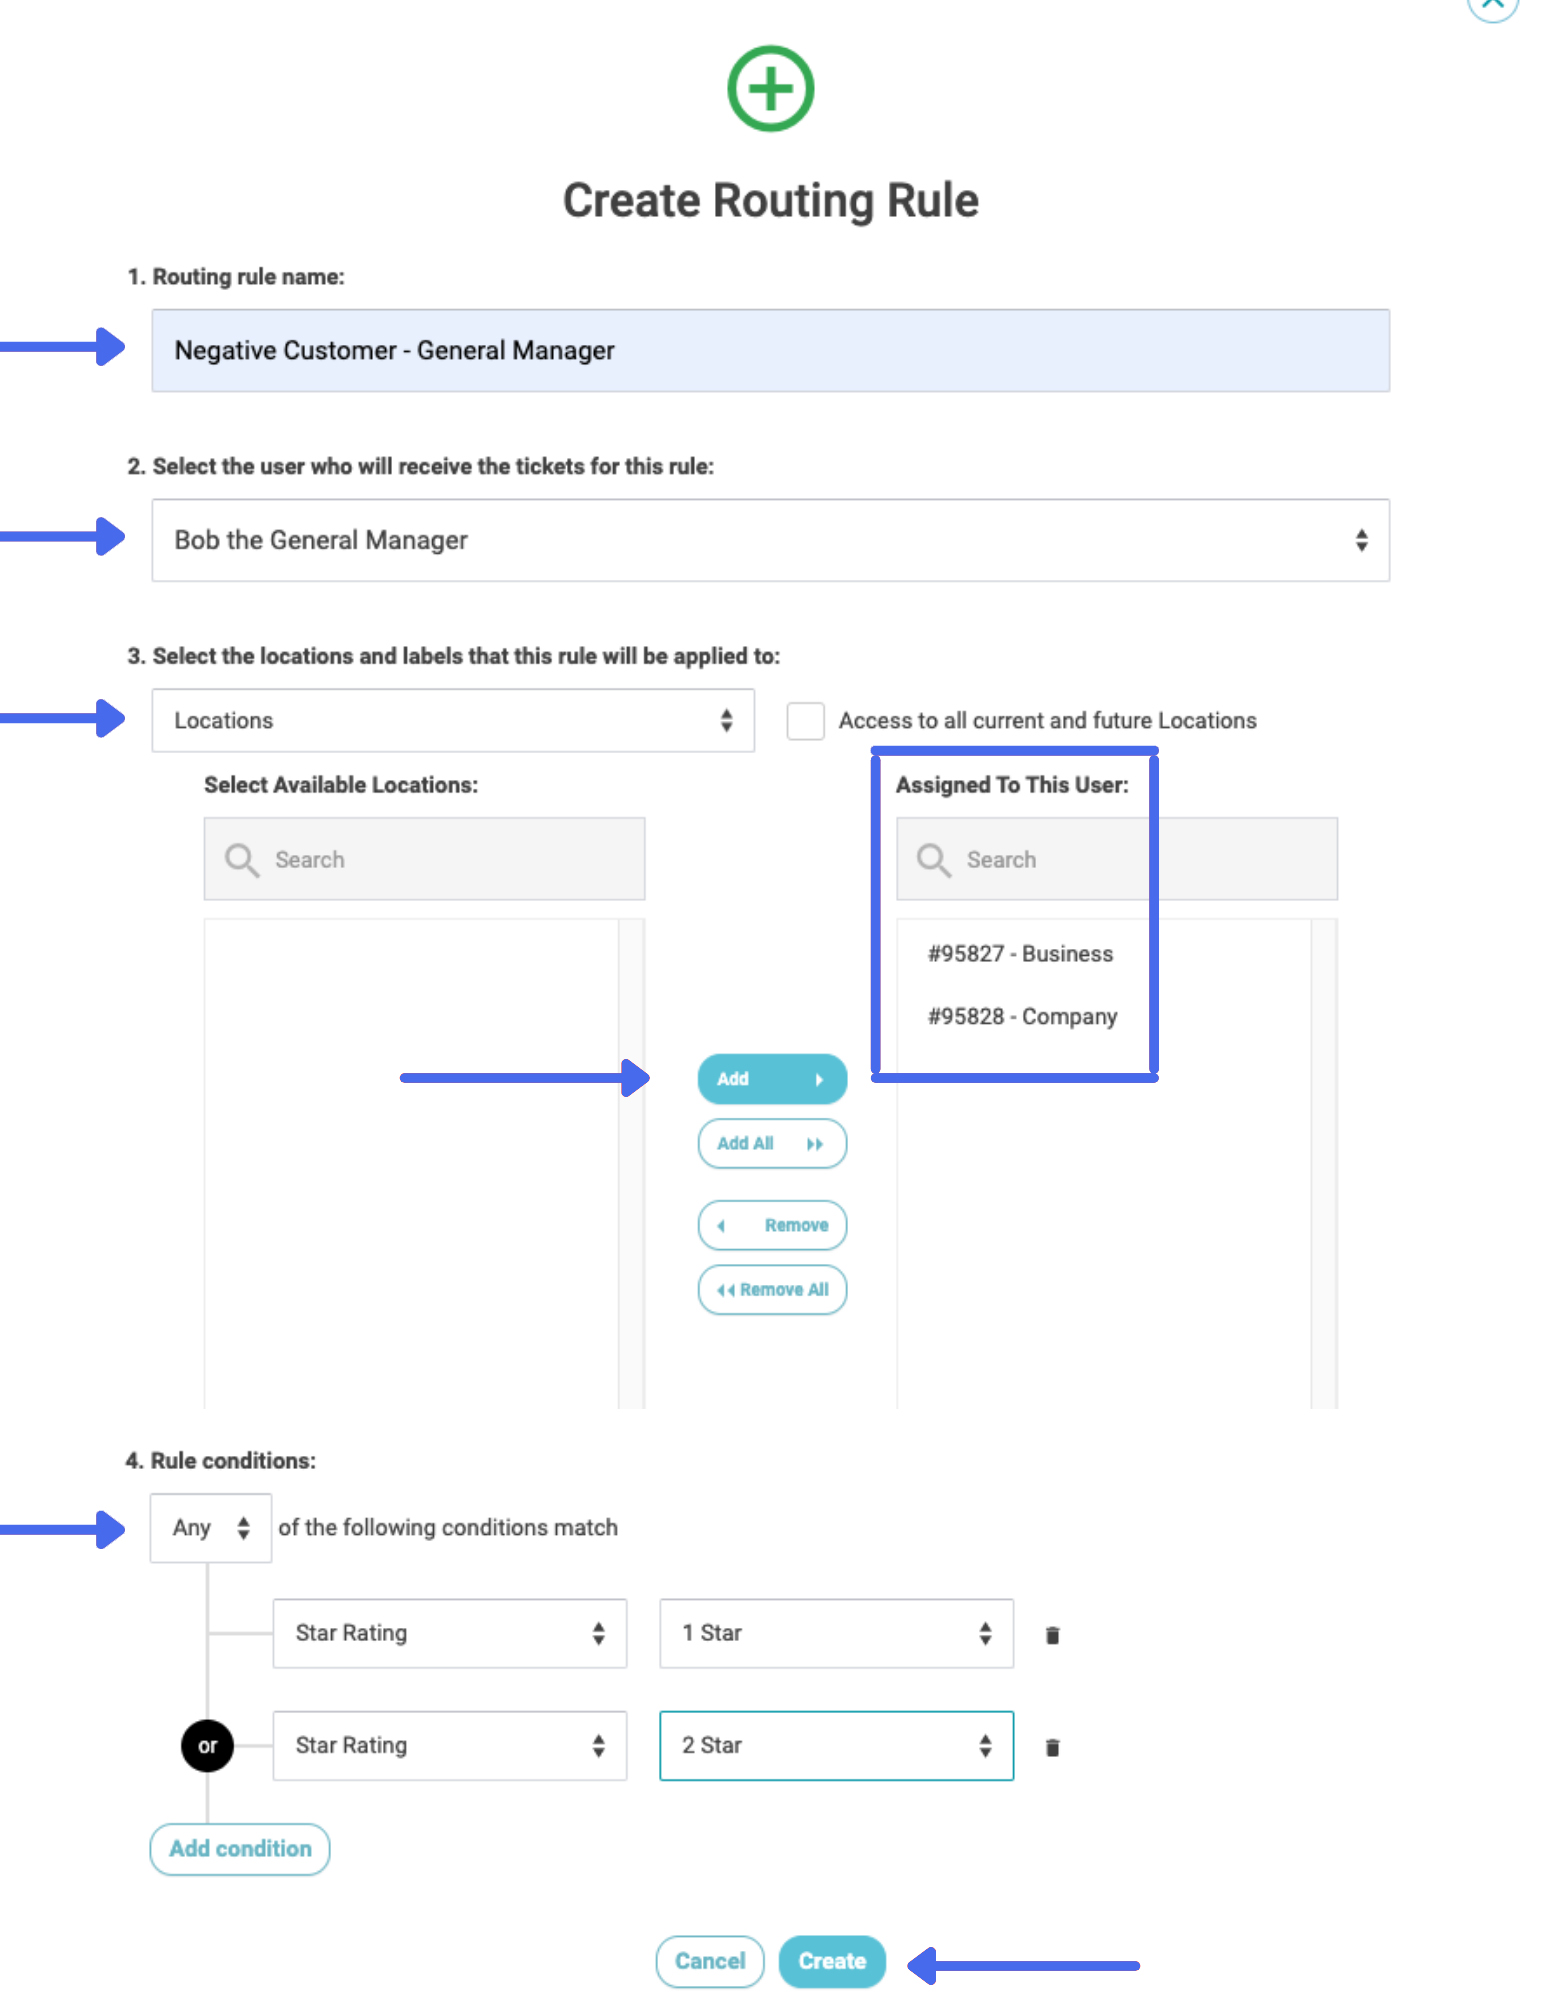
C. You can view your Rule(s) on the Settings screen. To Edit or Delete the Rule, simply click “Manage”

- Set Notifications - To send Notifications to the User to who the ticket is assigned or reassigned, use the Toggles in the Notifications section

You can always revisit this Settings screen if you want to create a new template, routing rule, or adjust notification settings.
MANAGEMENT
- Once you’ve got your settings how you like them, navigate to the Customer Activity Screen. Find the feedback you’d like to create a ticket for. On the right-hand side of the screen, click “Manage”. From the dropdown menu, click “Create a Ticket”

-
On the Create a Ticket screen, you'll see information like the location, Business ID, Review Source, and Net Promoter Score. You'll see the customer name, their star rating, and the feedback they left. Use the "Assign to" drop-down menu to assign the ticket to the desired user.
-
Click "Create Ticket". You have two options: Create Ticket or Create Ticket and Reply.
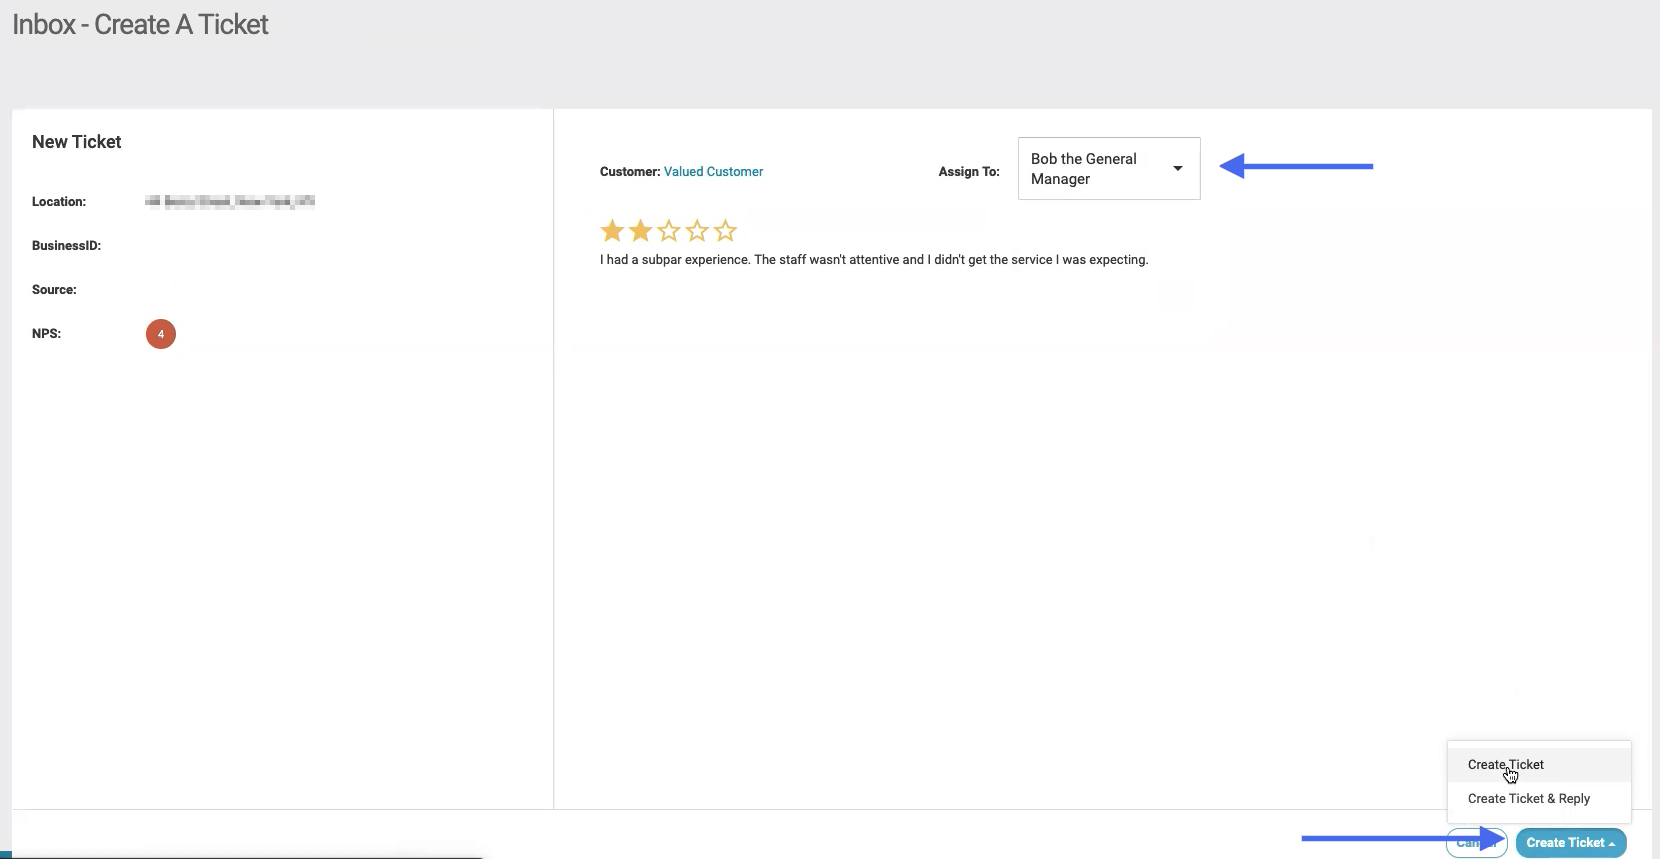
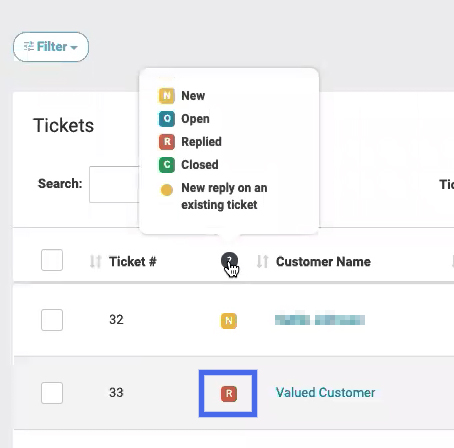
A. If you click "Create Ticket", a ticket will be created. You will then see it on your inbox screen. Some of the things you'll see are the Ticket Number, Status (which can be New, Open, Replied, Closed, or New Reply on an Existing Ticket)

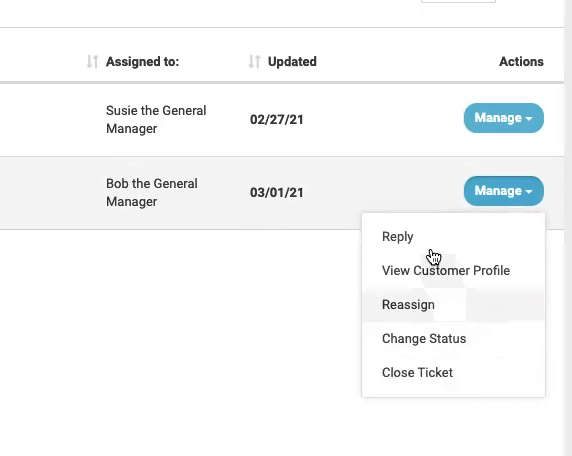
To interact with that ticket, click the Manage button. Here you'll see Reply, View Customer Profile, Reassign, Change Status, or Close Ticket.
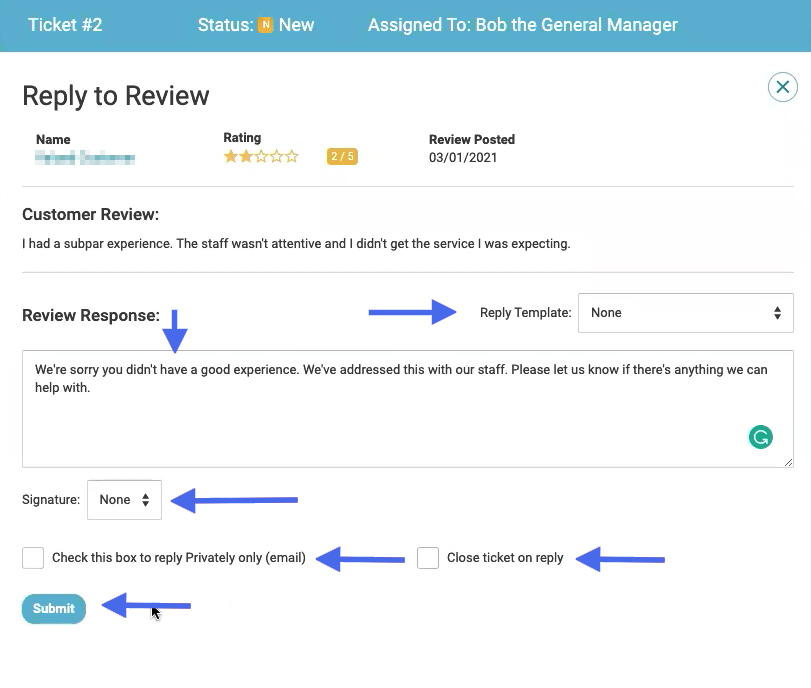
B. If you click Create ticket and reply, you will get a modal that pops up. Allowing you to reply, you can use a Reply Template from your dropdown. You can also choose to add a signature to your response. Signatures can be created within the User Profile.
If you simply want to send a private email to the customer, click the checkbox. If this is unchecked, you will send an email response to the customer AND the response will be visible on your Review Widget and Tag Widgets.
You can also choose to close the ticket upon reply, or you can leave it open for further communication. Once you're happy with the response, click "Submit"
Now we see that this customer has been replied to with our key.
- By clicking "Manage" on that ticket, you'll see options to reassign a ticket, change
the status manually, or close the ticket.
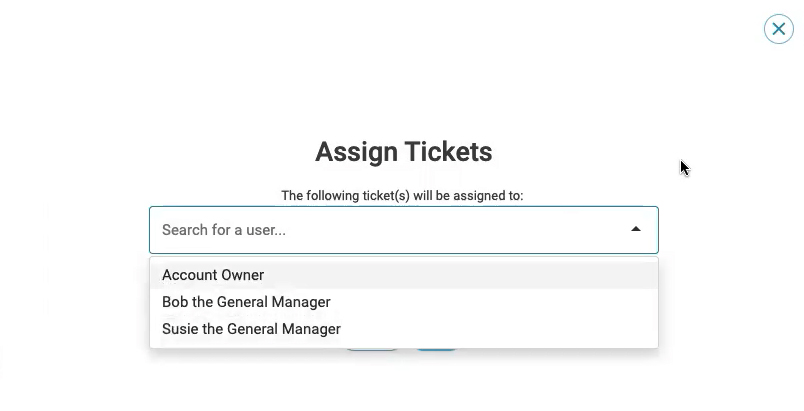
If you choose to reassign you'll get a drop-down menu with all available users.
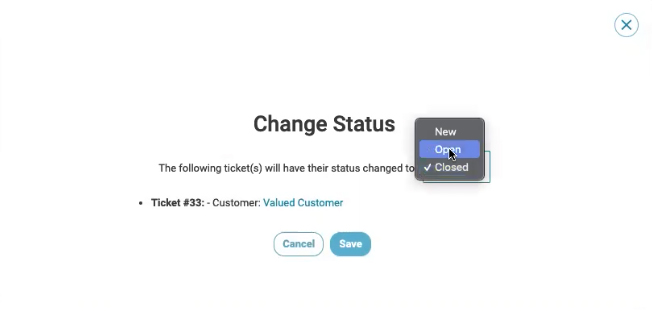
If you change the status, you'll be able to change it to one of the statuses available in the drop-down menu.
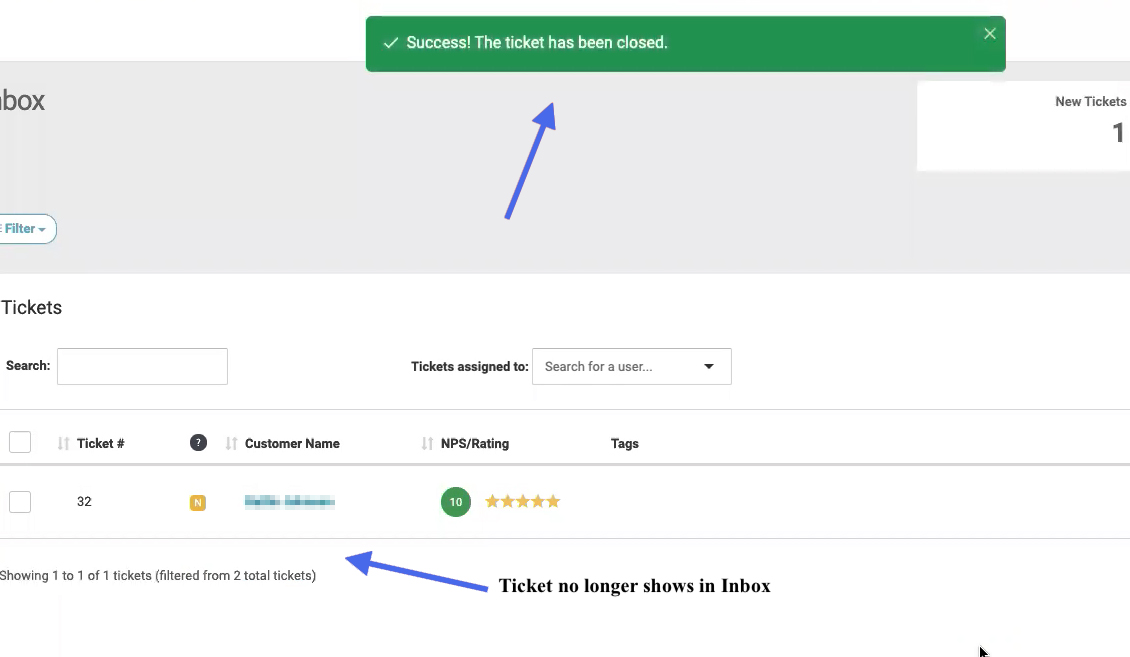
And if you close the ticket, you'll see that your tickets been closed and it will no longer show in your Inbox.
- Closed tickets are available using the filtering options. You'll see you can filter by status, net promoter score, and star Now we'll see if we filter by closed we see that that ticket has been closed.

